Make a Cheap Bean Bag Chair – DIY Guide
Making a bean bag by yourself is a super budget-friendly option. Other than that, you can customize it according to your requirement. So, these days most people tend to cut off their unwanted expenses and prepare their personalized items at home.
Moreover, if you can make a bean bag, why should you spend much money to buy them? Making your bean bag is always cheaper than buying a new one.
Generally, there are plenty of bean bags designs available in the market. According to the size, shape, usage, and price, customer can select their favorite one. Do you believe that you can prepare the same bean bag at home cheaper than the market price? Let’s see how.
First of all, take a paper and write answers to the following questions.
- What type of bean bag do you need?
- Draw your dream bean bag on paper
- What is the purpose of your bean bag?
- Is it use indoors or outdoors?
- How much do you can spend on the bean bag?
Now you have a better understanding of your requirement. Then think about the below facts.
Table of Contents
- Cheap Fabrics for Bean Bag
- Cheap Fillers for Bean Bag
- Steps to Make a Cheap Bean Bag Chair
- Make a Cheap Bean Bag Using a Laundry Bag
- Final Words
Cheap Fabrics for Bean Bag
If you already do not have fabrics to prepare the bean bag cover and lining, you must purchase them. So, in that case, try to select the best and low-cost materials.
Check the below fabric prices list.
| Fabric Type | Average Price for One Yard ($) |
| Cotton | 7 |
| Linen | 14 |
| Silk | 20 |
| Denim | 13 |
Suppose you can spend a bit more on your bean bag outer cover. You can purchase fur faux, velvet, or suede fabrics.
However, do not spend money on fabrics if you see the cheapest method to make bean bags at home. You can find the best alternatives from your home without spending much time.
Every home has a lot of clothes. Sometimes most of them use one time after purchase. Moreover, some clothes never use and take permanent space in your cupboard.
So, as a first step, open your locker or cupboard and check the fabric that has around 3 – 5 yards long.
You can select fabric for bean bag from the below clothes.
- Bed sheets collection
- Curtains
- Old sarees
- Old denim
- Flannel fabrics
- Table cloths
Make sure that fabrics are not in the decaying stages. Because to prepare bean bag we need a material that has good strength to stand with pressure and weights.
In addition to that, you do not need to worry about lining fabric colors too much. Because it hides with the outer cover, furthermore, if you don’t have large fabric pieces, you can join small pieces together.

Cheap Fillers for Bean Bag
Rather than expanded polystyrene balls, you can use alternative bean bag fillers that you can easily find from your surroundings. What is in your mind now? Check the below list to get an idea.
- Packing Peanuts
- Old Cloths
- Cotton
- Rice
- Hay
- Sand
- Small pebbles
Further, if you have an old sofa or mattress, you can use their memory foam to fill your bean bag. First, check whether those memory foams are in good condition. Then you can break them into small pieces and create shredded memory foam.
Now you have a better understanding of raw material selection. So, lets’ look at how to prepare a cheap bean bag chair.
Steps to Make a Cheap Bean Bag Chair
Once you find a suitable fabric that can give super comfort to you, you can start bean bag preparation. So here I describe how to make a cylindrical shape bean bag cost-effectively.
Moreover, please select the most attractive and comfy fabric for the outer cover because the inner bag does not directly expose people’s eyes and skins.
Required materials:
- Enough Fabrics
- Zipper
- Sewing Machine
- Seaming Threads
- Scissor
- Pins
- Measuring Tape
- Chalk or Fabric Pencil
Step 1: Take the Selected Fabric
For this, the fabric should have 6 yards (5.5m) long and 60 inches wide (150 cm).
Step 2: Spread your Fabric on a Flat Surface and Draw a Circle
When seaming, we need some extra fabrics. So, this circular should have 27 inches radius and 54 inches diameter.
Here, I mentioned suitable measures for a typical bean bag with 28 inches in height and 50 inches in diameter (H: 71 cm, D: 130cm).
Rather than that, you can alter the dimensions as you wish!
Step 3: Cut Two Pieces
Draw a 27 radius circle and cut the two circular pieces of the same size.
These two pieces should be an ideal copy of each other because they should be set on the upper and bottom sides of the bean bag.
Additionally, you can use chalk or fabric drawing pencil to mark shapes on fabric. If you need to prepare the liner of bean bag, you need four circular pieces.
Step 4: Cut Two Rectangular Shape Pieces
In this step, rectangular should have 87 inches in length and 32 inches in width. Moreover, you need to ideal two rectangular fabric pieces. Further, you can use the same fabric or different fabrics to cut rectangular.
If you prepare an inner cover, cut the same size fabrics from the material that is going to use for the inner bag.
Step 5: Sewing your Rectangular Cut Out Pieces
If you have enough fabric, you can cut 170 inches long, 32 inches wide rectangular at once. If not, sew and join the two pieces along with the fabric’s wide edge.
Step 6: Set Front Circle to the Rectangular Using Pins
These pins settle the fabric pieces at the correct places. Then you can easily seam them. Also, make sure to keep the right sides together.
In this step, you can use 2 inches from the edge of the circular and rectangular for sewing purposes.
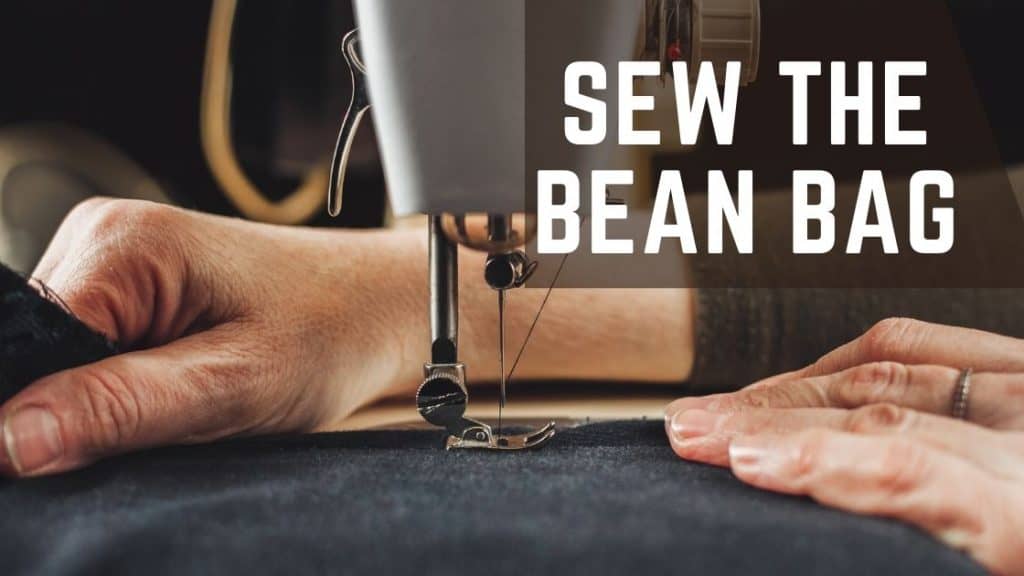
Step 7: Sew the Front Side Circle with the Rectangular
You can use a sewing machine for this. Then completely sew the rectangular shape piece to circular.
Step 8: Measure the Zipper Area
Some inner bean bags do not have a zipper. But, if you need to wash or clean your bean bag fillers, how do you remove them? That’s why the bean bag lining layer also needs a zipper.
So, in this step, you can use a 15-20 inches zipper for the inner lining bag. But it would be best if you had a much bigger zipper for the outer cover.
Using a childproof zipper for your bean bag is a good plan if you have kids in your home.
Thus, when you want to remove the outer cover, it should have open enough to remove the inner bag that fills with beans. So, you must use a 24-36 inch zipper for the outer cover of the bean bag.
Step 9: Continue Sewing
Besides the zipper area, sew the rest of the circular piece with a rectangular piece.
Step 10: Placing the Zipper
Place the zipper underneath the fabrics and join with pins.
Here, you have to place the zipper underneath on another edge of the rectangular fabric piece. Then, you can fix one side of the zipper to the rectangular piece.
Then attach another edge of the zipper to the bottom circular fabric piece.
Step 11: Sew the Zipper
Then, carefully seam both sides of the zipper with bean bag fabric.
Rather than fundamental factors, it would be best if you think about the safety of your bean bag. So, remove the zipper flaps from the inner and outer cover.
Now both the lining bag and outer cover are ready to serve you. So, please add selected fillers to it.
Generally, bean bags do not wholly fill with fillers. It only fills with 2/3 of fillers from its volume to take a super comfortable feel.
Special Note:
As I mentioned earlier, the outer bean bag and the inner bag-making process are similar. But when you are sewing the inner cover, make its volume a bit smaller than the outer cover. You can easily do that by sewing fabric 3 inches from the outer edge.
Make a Cheap Bean Bag Using a Laundry Bag
You can use a laundry bag to prepare a bean bag within 10 minutes. But you cannot use them for years.
Especially if you have kids, be aware of them because this bag does not have safety precautions like a safety zipper. Moreover, a lack of inner liner can cause to spill out bean bag fillers.
Step 1: First, chose large size laundry bag.
Step 2: Then, open the cord of the drawstring laundry bag.
Step 3: Fill selected fillers into it.
Step 4: Tie and knot the cord for the closed laundry bag.
Now you have a simple bean bag made with a laundry bag.
Final Words
The bean bag preparation procedures are the same for inexpensive bean bags too. The only difference is we use cost-effective materials for them. Or else we use already existing materials.
Thus, try the above methods. Besides mentioned shapes, you can try any shape for your cheap bean bag. You just have to change the dimensions of the fabrics to create them. So, add value to your leisure time and make your own furniture at home!