How to sew a Bean Bag?
Well, bean bags are comfortable and cozy. They can be used by people of different age groups right from little kids to adults. It can be used to sit and relax while watching your favorite television show or you can sit on it and chill with your buddies.
Now, if you are wondering how to sew a bean bag? Then here are a few tips for you. Let us take a closer look at them in this article.

Table of Contents
- Tips to sew bean bags – just the way you would want it to be
- Essential things required to sew your bean bag
- What are the most common uses of the bean bag?
- The method of making your bean bag
Tips to sew bean bags – just the way you would want it to be
Here, we are going to give you some tips on sewing bean bags, which can be customized as per your preference. Well, but now you will ponder upon why should you sew a bean bag when you can easily purchase one for yourself, isn’t it?
Yes, there are tons of options to choose from available online and even in the market. But when you decide on sewing your bean bag, it gives you the freedom to make it just the way you want it to be.
You can decide on the size, color, print, texture, and pattern – this can also be suitable for your budget.
Essential things required to sew your bean bag
The fabric of your choice
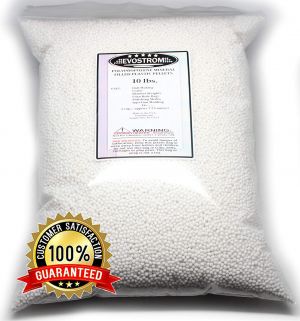
What fillers are you going to put inside the bean bags? – Glass beads filling, rice, beans, seeds, popcorns, or anything suitable for your beanbag.
- Muslin
- A measuring cup
- Sewing machine
- A measuring tape
- Scissors, thread, needle, and straight pins
What are the most common uses of the bean bag?
Furniture: well, like we all are aware, bean bags are commonly used as furniture which is cool and fashionable.
Bed for your pets: if you have a pet and want it to have a comfortable sleeping or sitting place, then you cannot deny that a bean bag is a great option! They can provide great comfort to your pet and also will last for a long time.
Camera stand: these days, traditional tripod stands are getting replaced by bean bags. Isn’t it cool, though?

The method of making your bean bag
Selecting and cutting your fabric:
firstly, you need to know why and where you are going to use the bean bag. If it is going to be only for interior use, then make sure you opt for an appropriate fabric, but if you are going to use it outside your home too then, you will have to take care of the type of fabric you are going to buy.
You don’t need to go and buy new material, and you can use something that is lying in your household unused. Then after you have selected the fabric, you can start cutting it out in the desired dimensions.
You can read our guide on selecting the best fabric for your bean bag here.
You can make your bean in any size that you would prefer. Be careful while cutting the material; make sure you use a pencil to mark your dimensions.
Sewing:
You need to use two equal fabrics together where their right sides will be facing one another. Then you need to sew on the inside of the fabric, and to keep them straight together, do not forget to use straight pins.
Also, if you are using the sewing machine for the very first time, ask for some help from an experienced person so that you do not mess with the stitching part of your bean bag.
Just make sure you keep your fingers away from the needle. Another essential thing that you need to bear in mind is that you have to keep a larger opening for your bean bag on one side so that you can put the fillers into it without much hassle.
Also, the fabric in the corners should be smooth, and thus, you need to make sure you avoid bulging. Be at the same time, and you need to be careful and ensure that you do not cut the thread or make a hole into the fabric.
Once you have finished sewing, and then carefully turn the pockets inside out. Then slowly, with the help of your fingers, tuck the corners.
Let’s fill it up:
Now, it is time to fill up your bean bag. So, here you need to use the muslin inserts rather than filling up the bag directly. With this, you do not have to worry about your bean bag getting messed up because it will last for a longer period.
You need to fill the muslin bags with your preferred choice of filling. But always bear in mind not to fill up the insert completely. If you stuff your bean bag with the filling, then it is going to be quite tricky for you to stitch it in the last step.
If you are using smaller fillers like rice, then you can make use of a funnel to put it in the inserts. So, after you have filled the bean bag, your bag will be ready for its final touch. Make sure you have left some space and not filled it because you need to stitch it and make it fluffy. You can hold an open place with a pin.

Giving it the final touch:
In the last step, you have to sew the open end from where you fill all the fillings in your bean bag. But you need to take care and see that there is no spilling of the beans.
About the muslin bag, you do not have to stress about it too much, but see that the hole is secured well. After that, you need to put muslin insert into the pockets that you have made. After that, you can shut it with a pin, and then with the help of a sewing machine, make sure you sew it up well.
If you find it challenging to use the sewing machine, you can also use needle and thread to get this work done – get it done just the way you want it to be!
Read our guide on How to make a bean bag without sewing to make a bean bag if you don't have sewing skills.

5 Comments